







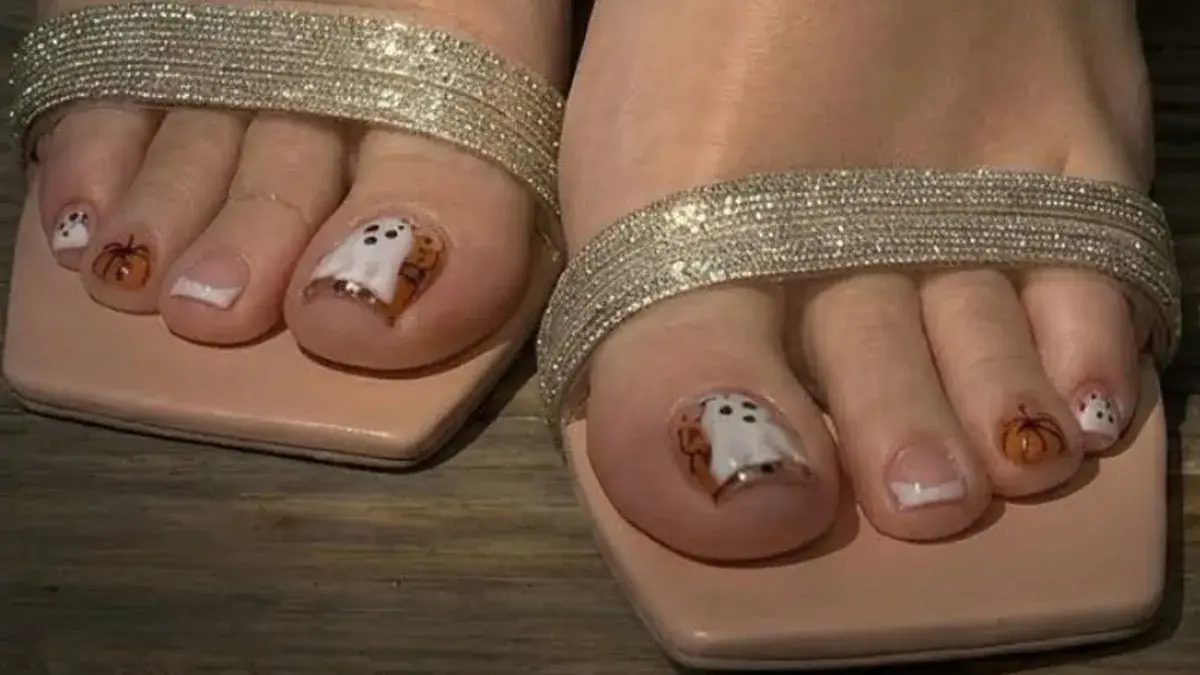
Look closely at the feet in the photo above: champagne glitter straps, a pair of thin gold anklets, a glowing pumpkin in the background, and on the toes a tiny ghost, a smiling pumpkin and a soft French tip, all in the space of a few millimetres. It is the kind of detail that makes people stop scrolling, and it is the reason Halloween toe nails ideas are one of the easiest ways to join in the season without committing to a full costume.
Toes are a generous canvas for small, playful art. The nails are short and flat, they are hidden by socks and boots most of the week, and a pedicure lasts longer than a manicure because toenails grow more slowly. If you are collecting nails ideas for October, the foot is a place where you can be as silly as you like and still look polished.
This guide starts from the look in the photo, breaks it down nail by nail, then gives you twelve Halloween toe nails ideas with the colours that go with them, a step-by-step method for doing them at home, and the dermatologist advice you need for wearing and removing them safely. We also show how Google visitors actually phrase the search, using the live suggestions we saw on 3 November 2026. The design ratings and colour pairings are our own suggestions, not measured results; the care advice is linked to its sources. You can read how we work in our editorial policy and our disclaimer.
Key takeaways
- The look in the photo is a nude base with a ghost on each big toe, a pumpkin on the fourth toe, a soft French tip on the middle toe and a mini ghost on the little toe.
- Halloween toe nails work best when you keep one hero design per foot and let the other nails stay quiet: plain nude, milky white or a French tip.
- A short square nail has room for one simple motif. Draw it with a dotting tool or a fine brush, then seal it with a clear top coat.
- Dermatologists advise never cutting or forcing back your cuticles and moisturising after removing polish, which matters more when you change designs often.
- Remove gel or dark art with acetone on small pieces of cotton and plastic wrap, not by picking or filing the polish off.
Contents
The look in the photo, nail by nail
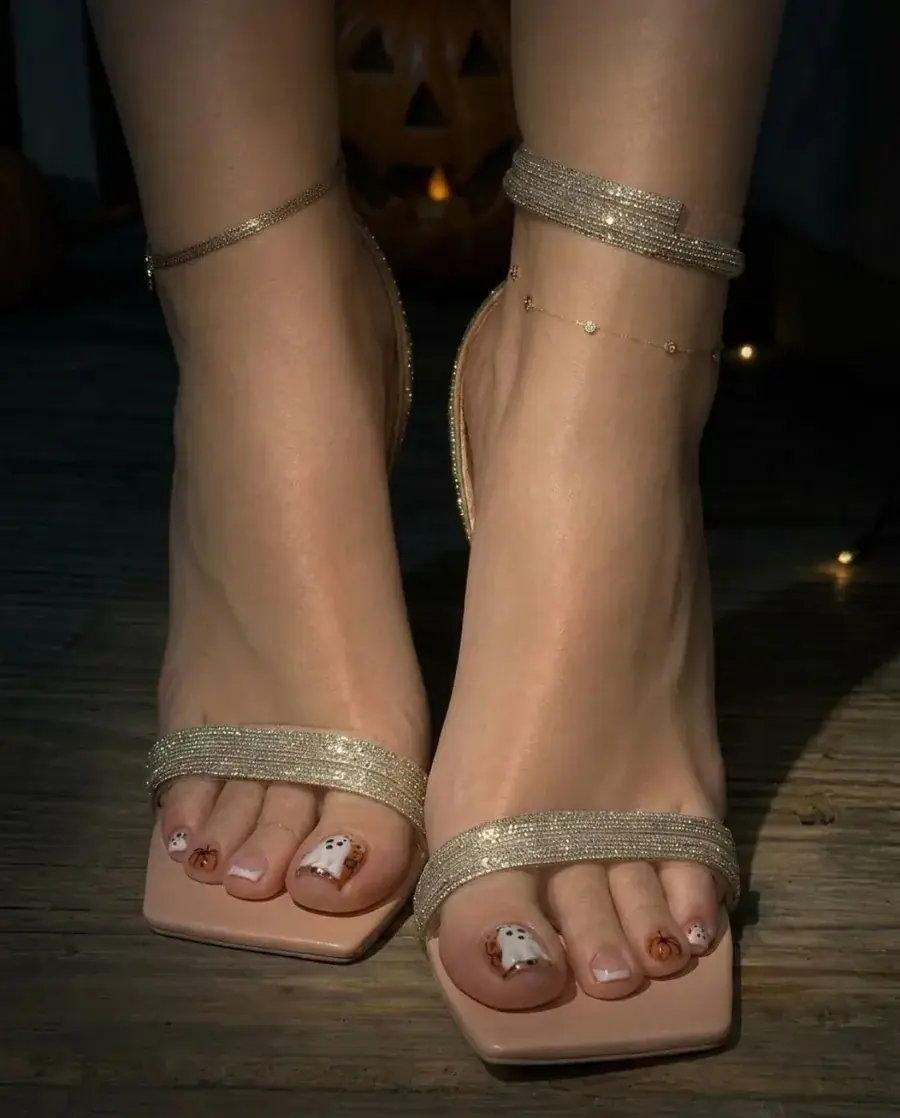
The pedicure in the picture is a good lesson in restraint. The base is a sheer nude that sits close to the skin tone, which means the artwork reads as the only thing happening on the nail. On top of that base, each toe has a different job.
- Big toes: a white ghost with two black dots for eyes and a wavy hem, drawn slightly off-centre so it looks like it is floating.
- Second and middle toes: a plain nude or a thin milky French tip that frames the nail without competing with the ghost.
- Fourth toes: a small orange pumpkin with a green stem and a dark outline, the only warm colour on the foot.
- Little toes: a mini ghost or a white tip with two dots, which repeats the big toe design at a smaller size.
Notice the rhythm: ghost, quiet, quiet, pumpkin, ghost. Designers call this an accent pattern, and it is why the set looks planned instead of busy. You will see the same logic in every idea below.
The accessories help too. Glitter straps and a fine gold chain add sparkle at ankle level, so the nails themselves can stay matte-white and soft. If you want to explore the history and techniques behind this kind of miniature artwork, the general overview of nail art on Wikipedia is a good starting point.
Why toes are the best place for Halloween nail art
Most Halloween nail ideas are shown on hands, but there are practical reasons to try them on your feet first.
First, the risk is low. A smudged ghost on a toenail is hidden by a shoe. A smudged ghost on a thumbnail follows you into every meeting. Second, the nail is flat and wide. A big toenail is often the largest nail you have, and it takes a motif well. Third, a pedicure lasts. Toenails grow more slowly than fingernails, and they are protected from daily knocks, so artwork stays crisp for longer.
There is also the seasonal side. In warm regions, sandal weather overlaps with Halloween, and a decorated toe is a natural match for open shoes. In cooler places, a Halloween pedicure is a small private joke you share only when you take your boots off, which many people prefer.
Finally, the search interest is real. When we typed the phrase into Google on 3 November 2026, the autocomplete suggested extensions such as “halloween toe nails simple”, “halloween toe nails designs”, “halloween toe nails spider web”, “halloween toe nails pink”, “halloween toe nails easy” and “halloween toe nails short”. These are only suggestions, not search volumes, but they show what people are looking for: easy, short, simple and web designs. We built the list below around those requests.
12 Halloween toe nails ideas to try
1. The little ghost on the big toe
This is the hero of the photo. Paint a white teardrop on the big toenail, widen it at the bottom with a wavy edge, and add two black dots for eyes. Keep the base sheer so the ghost stands out. It works on a nail of any length and is the best first design for beginners.
2. The pumpkin accent
Choose one toe, usually the fourth, and paint a small orange oval with two curved lines for ribs and a tiny green stem. A dark outline makes it readable at a distance. The rest of the nails can stay nude, which keeps the pumpkin the only warm shade on the foot.
3. Ghost and pumpkin mix
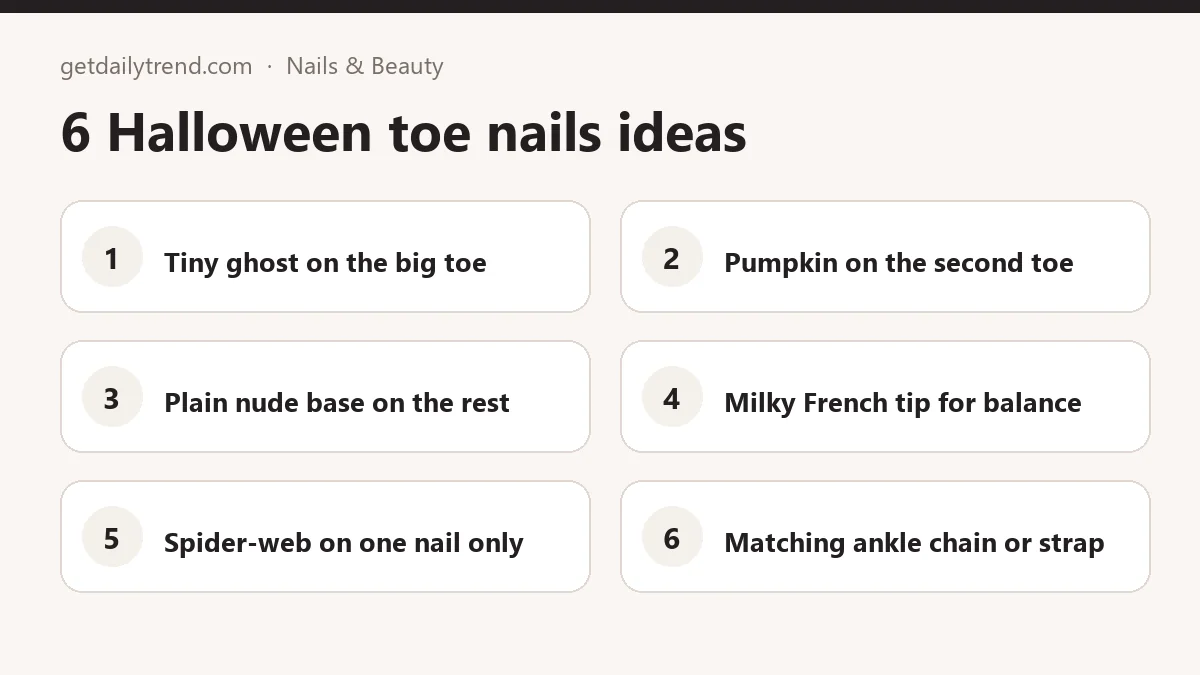
The look in our photo: ghosts on the big and little toes, a pumpkin on the fourth, French tips in between. It is the easiest way to look like you planned an entire theme without drawing ten different motifs, because only two small designs repeat.
4. Nude base with milky French tips
If you do not want illustrations at all, use a sheer nude with a thin milky white tip. It nods to ghosts without drawing them, and it goes with every outfit, so you can keep the pedicure after Halloween has ended.
5. Spider web on one nail
Google suggests “halloween toe nails spider web”, so there is clearly demand. Paint a black base on one toenail only, then draw three or four lines from a corner and connect them with curved strokes. A single web on a sheer-nude foot looks chic; ten webs look costume-like.
6. Jack-o’-lantern face
Paint a full orange nail, wait until it is dry, and add a black triangle nose and a crooked mouth with a fine brush. This design reads well on the big toe because it has the room for three shapes.
7. Pink ghosts
One of the suggested searches is “pink ghost toe nails”. Replace the white ghost with a soft pink one on a pale base, or invert it with a white ghost on a pink base. It keeps the playful shape and trades the stark white for something softer.
8. Purple and green witch
Combine a deep violet base with a lime or sage accent on the ring toe. Add a tiny black hat shape or a moon on the big toe. These colours look striking against a tan or a sun-kissed skin tone.
9. Black and orange French
Swap the white French tip for black on every nail and add one orange tip on the big toe. It is the simplest graphic design in the list and the best option if you want a clean line instead of drawings.
10. Candy corn stripes
Three horizontal bands of yellow, orange and white on the big toe, with a plain cream base elsewhere. Use thin tape or a striping brush to keep the lines straight. It is colourful but friendly.
11. Mummy wrap
Paint a pale grey base and draw thin crossing white lines, leaving a gap for two eyes. Simple, graphic and easy to correct if the lines wobble, because the overlap hides small errors.
12. Bats and moon
On a dark navy base, add a small yellow crescent moon on the big toe and a black bat silhouette on the fourth toe. It is a good choice for evening events, and it is a gentle way to bring Halloween into a more elegant look.
Colour pairings that make Halloween toe nails look intentional
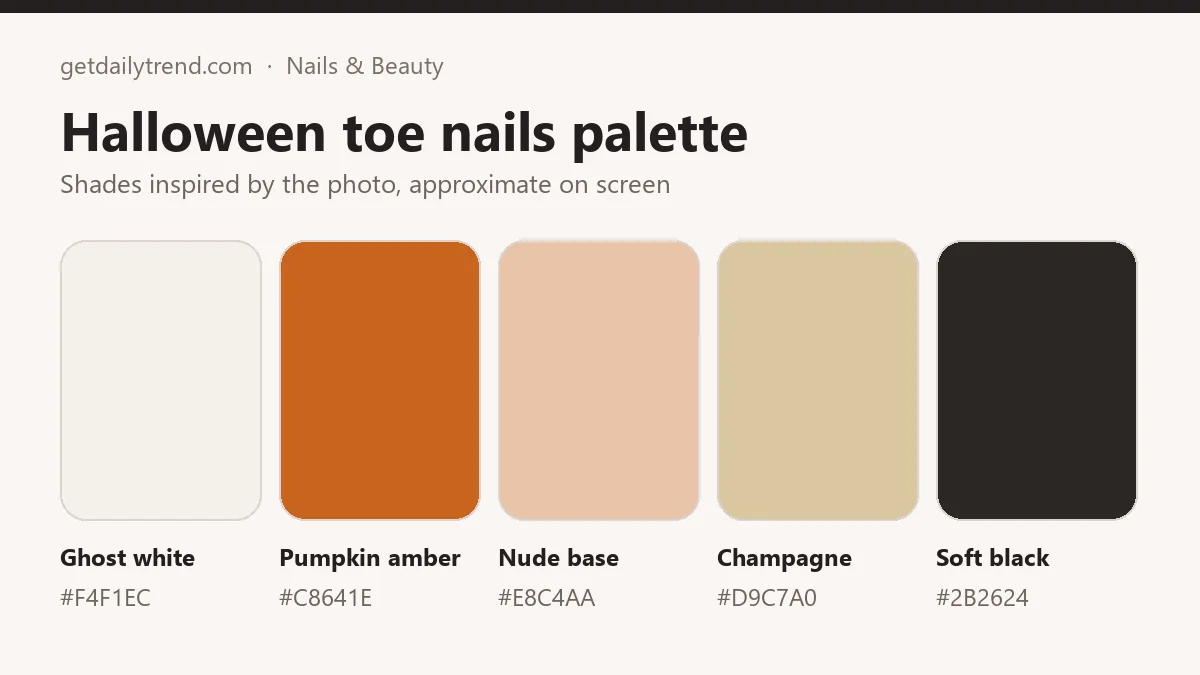
A palette of five shades is enough for almost any Halloween pedicure. The card above shows the one used in our photo: ghost white for the ghosts and French tips, pumpkin amber for the pumpkins, a nude base that sits close to the skin tone, champagne glitter for the sandals, and soft black for outlines and eyes.
The rules that make the palette work are simple.
- Pick one warm accent. Orange or amber is enough. Adding red, yellow and orange at once starts to look like a traffic light.
- Let black do the drawing, not the filling. Use it for eyes, outlines and stems, in very small amounts.
- Keep the base close to your skin. A nude or sheer pink base gives the designs room and makes the nails look longer.
- Echo the metals in your jewellery. Gold anklets and champagne straps suit warm tones; silver chain suits purple and grey.
| Mood | Base | Accent | Best motif |
|---|---|---|---|
| Soft and cute | Sheer nude | Milky white, pale pink | Ghosts, mini ghosts |
| Classic Halloween | Sheer nude | Pumpkin orange | Pumpkins, jack-o’-lanterns |
| Witchy | Deep violet | Sage or lime green | Moon, hat |
| Graphic | White or cream | Black, orange | French tips, stripes, webs |
| Evening | Navy | Yellow, silver | Moon, bats |
Short toenails: how to fit a design in a small space
Many people choose the “short” version of these searches, and it makes sense: most toenails are short and wide. A few principles help.
Use one motif per nail. A ghost and a pumpkin on the same nail is too much. Choose the biggest toe for the largest drawing and reduce the size on the other toes.
Draw simple shapes. A ghost is a teardrop with two dots. A pumpkin is an oval with two lines. A web is four lines and some curves. If you can sketch it in under ten seconds, it will work on a toenail.
Work from sheer to opaque. Light coats let the base show through, so the nail does not look heavy. Opaque colours are better for the motif itself.
Leave a clean edge. A thin line of bare nail near the cuticle makes the nail look longer and keeps polish from touching the skin.
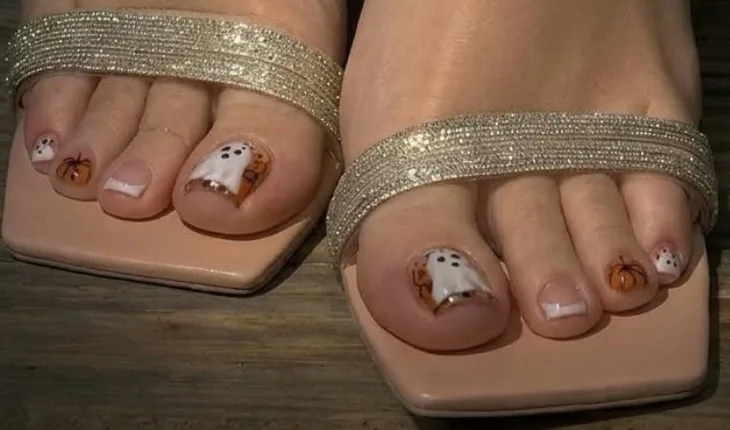
The close-up shows how little is needed: a pair of dots for the eyes, a thin stem and a soft French tip. If you are unsure about the shape of your own nails, our nail shape guide compares seven common shapes and explains how to choose one for your nail bed. On toes, a squared or softly squared edge is the usual choice because it follows the natural outline of the toe.
How to paint Halloween toe nails at home, step by step
You do not need to be an illustrator. You need a steady surface, a thin brush or a dotting tool, and patience between coats.
- Prepare the nails. Clean the nails, push nothing back and cut nothing off. The American Academy of Dermatology advises never cutting or forcefully pushing back your cuticles, because it can lead to infection. If you must push them back, do it gently after a shower or bath.
- Shape and file. Cut toenails straight across and file with an emery board. The AAD recommends keeping toenails short and trimming them regularly to lower the risk of injury.
- Apply a base coat. A thin base coat protects the nail from staining, especially when you use dark colours such as black or deep purple.
- Paint the base colour. Use two thin coats of sheer nude and let each one dry.
- Add the French tips. Use a thin brush, or place a tip guide on the nail. Keep the line soft rather than perfect.
- Draw the motif. Dip a dotting tool in white polish for the ghost body, wait a minute, then add eyes in black. Pumpkin ribs are two curved strokes with a fine brush.
- Seal with a top coat. One thin layer of clear top coat covers the drawing and brings everything to the same shine. Do not drag the brush across the artwork; float it over the nail.
- Moisturise. Apply cream around the nails once the polish is dry.
If you shave your legs, do it after a pedicure, not before. The AAD notes that a nick made while shaving could put you at risk of infection if you then have a pedicure, so it recommends waiting at least 24 hours between shaving and a pedicure.
Matching your sandals, anklets and outfit
The photo works because the jewellery is quiet. Gold anklets, a thin chain with small stones and a glitter strap give the foot a finish, so the nails do not need extra decoration.
- Glitter or rhinestone sandals: keep the base nude and the art small. The shoe is already sparkling.
- Plain leather sandals or flip-flops: the nail art can be bolder, with dark bases and stronger contrast.
- Closed shoes and boots: choose the designs you love most, since only you will see them. This is the best time to try the spider web or the mummy wrap.
- Toe rings: a thin gold ring on the second toe suits white, nude and pastel bases. For background on toe jewellery, see the entry on toe rings.
If you want a different mood afterwards, move on to a colour story rather than a theme. Our dark red toe nails ideas take the same pedicure logic into autumn, and the brown and caramel toe nails ideas are a warm bridge between Halloween and winter.
Care and safe removal
Halloween art is usually removed within two weeks, so how you take it off matters as much as how you put it on.
Moisturise after removal. The AAD recommends applying a cream to your nails, especially after removing polish, because most removers contain chemicals that dry the nails.
Do not pick. Picking or filing off gel polish can significantly damage the nail, according to the dermatologist quoted by the AAD. Instead, use 100 per cent acetone on small pieces of cotton cut to the size of each nail, wrap each nail with plastic food wrap, and leave it for about 10 minutes. The AAD recommends plastic wrap rather than foil because it makes a tighter seal and the acetone is less likely to drip. Put a thin layer of petroleum jelly around the cuticles first, to protect the skin.
Avoid the orange stick. The same page warns against using an orange stick to remove gel polish, because it can injure the nail and cause white spots.
Watch for dark colours. If you use a bright or dark polish, a base coat helps prevent discoloration. The AAD adds that nails yellowed by polish should return to their normal colour over several weeks if the same colour is not reapplied.
Mind the products. In the United States, nail products for home and salon use are regulated by the FDA, and they should be used following the label directions and warnings. The agency’s page on nail care products explains the ingredients and how to report a bad reaction.
Listen to your nails. If a nail changes colour, swells or hurts, see a dermatologist rather than covering it with polish. This is the same advice the AAD gives in its tips for healthy nails, and it applies even more when you wear decorative polish, which can hide early signs.
Salon or DIY: which one for Halloween toe nails?
| Question | At home | At the salon |
|---|---|---|
| Cost | Polish and a thin brush | Usually a service fee, plus art charge |
| Detail | Simple shapes, one motif | Finer lines, many motifs |
| Time | One to two hours with drying | Often under an hour |
| Control | You choose every colour | Bring a photo and ask for a sample |
| Safety | You control the tools | Check cleanliness and licensing |
If you go to a salon, the AAD suggests checking that the technician has the necessary experience or license where required, that stations are clean, that hands are washed between clients and that no dirty tools are lying around. It also advises you to ask how tools are cleaned, and to look at whether pedicure foot baths and filters are disinfected. If the salon does not appear clean, leave.
Mistakes to avoid
- Too many motifs. If every toe has a different drawing, none of them stands out. Choose two designs at most.
- Thick layers. Heavy coats take a long time to dry and smudge easily. Use thin coats.
- Skipping the base coat. Black, purple and deep orange can stain the nail.
- Painting over damaged nails. Fix the nail first, decorate afterwards.
- Cutting the cuticles. It makes the edge look tidy for a day and increases the risk of infection.
- Forgetting the top coat. Without it, the artwork loses its shine and chips at the edges.
Conclusion: pick one ghost and start there
The best Halloween toe nails ideas are the ones that look intentional: a sheer base, one small hero design per foot, a limited palette and a good top coat. Start with the little ghost on the big toe, add a pumpkin on the fourth toe if you like, and leave the rest soft. When Halloween is over, a nude base with a thin French tip still looks good, so nothing is wasted.
For more inspiration, browse our Nails & Beauty section, then continue with the white toe nails ideas for a clean, graphic look or the lilac toe nails ideas for something softer.
What are the easiest Halloween toe nails ideas?
A single white ghost on the big toe is the easiest: a teardrop shape, a wavy hem and two black dots. A plain nude base with a thin milky French tip is the easiest option if you do not want to draw anything.
How do I make Halloween toe nails look classy instead of costume-like?
Keep the base sheer and close to your skin tone, use one or two small motifs, and limit the palette to white, one warm accent and a little black. Seal the art with a clear top coat for a single, even shine.
Can I do Halloween toe nail art on short nails?
Yes. Toenails are usually short and wide, which suits small shapes such as a ghost, a pumpkin or a spider web. Use one motif per nail and draw simple shapes with a dotting tool or a thin brush.
How long does a Halloween pedicure last?
It depends on the polish, the care you take and how much your shoes rub the nails. Toenails grow more slowly than fingernails, so many people find that a pedicure lasts longer than a manicure. Most Halloween designs are removed after a week or two so that the polish does not stay on too long.
How do I remove Halloween toe nail art safely?
The American Academy of Dermatology suggests using 100 per cent acetone on small pieces of cotton, wrapped in plastic food wrap for about 10 minutes, after protecting the skin with petroleum jelly. Do not pick or file the polish off, and moisturise afterwards.
Should I cut my cuticles before a Halloween pedicure?
No. The AAD advises never cutting or forcefully pushing back cuticles, because it can lead to infection. If you must push them back, do it gently after a shower or bath.
Is it safe to wear dark polish on toenails?
Dark polish is generally fine for healthy nails, but it can stain. A base coat helps prevent discoloration, and nails yellowed by polish should return to their normal colour over several weeks if the same colour is not reapplied, according to the AAD. If your nails change, swell or hurt, see a dermatologist.