







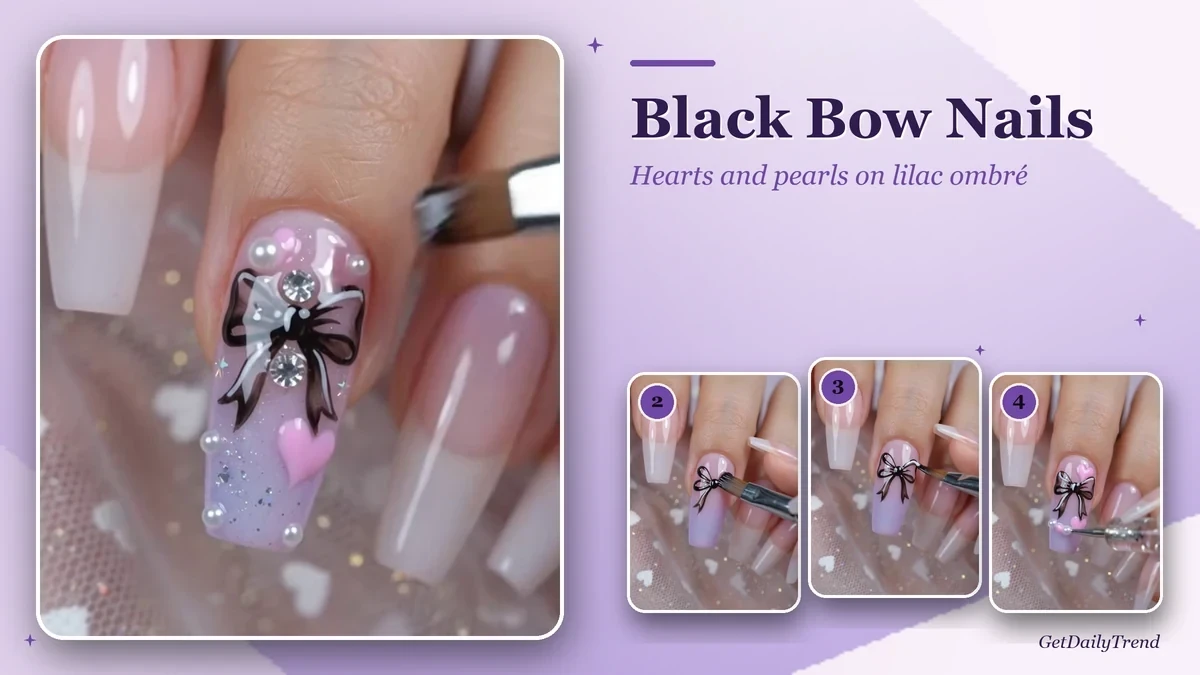
Black bow nails are a sweet, slightly rebellious way to dress a pastel manicure, and this tutorial follows every stage shown in the video: a soft pink-to-lilac gradient on a long coffin nail, a black bow drawn with fine strokes, pink hearts, a ring of tiny pearls, small sparkle glints and a few crystals set with tweezers, all filmed against sheer tulle scattered with white hearts.
Everything below is based on a real step-by-step video, and each stage is illustrated with a frame taken from that footage. You will see which tools appear on screen, in what order the design is built and which small mistakes can spoil the bow. Our editorial policy explains how we describe what we can and cannot see.
The video is a short clip without spoken instructions, so we describe only what is visible: the brushes, the dotting tool, the tweezers, the colours, the order of the steps and the final look. We do not know the brand or type of any product, and the video does not say how long anything is cured. Where the video is silent, we say so and offer a general suggestion, clearly marked as a suggestion.
Key takeaways
- These black bow nails combine a pink-to-lilac gradient, a black bow with white highlights, two pink hearts, a ring of white pearls and small crystals on a long coffin nail.
- The video shows a flat brush with brown bristles, a fine brush with a silver handle, a dotting tool with a clear handle and a pair of tweezers.
- The order matters: gradient, bow, hearts, pearls, sparkle glints, crystals, then the finishing pass.
- The video does not show brands, product types or curing times, so follow the instructions of your own products and lamp.
- Keep the bow at the top of the nail, leave room for the hearts and let the pearls frame the lower part, so the design stays balanced.
Contents
Quick answer: how do you do black bow nails?
Start from a soft pink-to-lilac gradient, draw a black bow near the top of the nail, add white highlights to give it volume, place two pink hearts beside it, set small pearls along the bottom, add tiny sparkle glints and a few crystals on the bow, and finish with a layer suited to your own products.
What these black bow nails look like
The finished accent nail is long and coffin-shaped, with a gradient that runs from a clear pink at the cuticle to a pale lilac at the tip. A black bow sits at the top: its outline is crisp and glossy, and the loops are filled with a soft grey-white that makes the ribbon look like satin. Two small crystals shine on the bow, one at the knot and one below it.
Beneath the bow, a pink heart with a glossy, slightly raised look floats near the tip, and a second one peeks out near the top. A ring of tiny white pearls follows the lower edge and the sides, and fine silver glitter and small star-shaped sparkles are scattered over the lilac. The neighbouring nails stay simple, in a milky, translucent pink with a soft white tip. The video is filmed on a sheer tulle fabric dotted with white hearts, which echoes the theme.
Why this black bow design works
The pastel gradient keeps the nail soft, and the black bow gives it a strong centre of attention, so the contrast feels playful rather than harsh. The pink hearts bring the colours of the gradient back into the design, the pearls frame the nail like a border, and the crystals add a little shine without hiding the bow. The palette stays within pink, lilac, black, white and silver.
Materials and tools for black bow nails
The video shows several tools clearly. Everything else is a colour or detail visible on the nail, or a reasonable addition. We separate the two groups so you know what the footage confirms.
Visible in the video
- A flat brush with brown bristles and a metal ferrule, used near the bow and for the final pass.
- A fine brush with a silver handle, used for the bow details and the small glints.
- A dotting tool with a clear handle, used to place the pearls.
- A pair of pointed tweezers, used to set a pearl and the crystals near the bow.
- A pink and lilac gradient, a black colour for the bow and a pink colour for the hearts.
- Small white pearls, small crystals and fine silver glitter.
- Milky pink nails with a soft white tip as the neighbouring nails.
Suggested additions (not shown in the video)
- A base layer and a clean, shaped nail before you start.
- A palette for small amounts of colour.
- A lint-free wipe and a little cleanser to tidy the edges.
- A lamp and a finishing layer that match your own products, used as their instructions say.
- An adhesive that suits your product type for the pearls and crystals, used as its instructions say.
- A very fine liner brush if you want thinner bow outlines.
Materials checklist
- Flat brush for the gradient and the finishing pass
- Fine brush for the bow and the sparkle glints
- Dotting tool for the pearls
- Tweezers for the crystals
- Pink, lilac, black and white colours
- Small pearls, crystals and fine silver glitter
- Lamp that matches your products
- Finishing layer that matches your product type
- Palette, lint-free wipe and cleanser
Preparation before you start
A bow with fine outlines needs a clean, smooth surface, because a black line shows every bump and the gradient looks best on an even base. In the video the nails are long, coffin-shaped and evenly filed, which gives the bow a calm background.
- Shape and tidy the nail. The design in the video is on a long coffin nail, but black bow nails also work on shorter nails if you draw a smaller bow.
- Follow your own products and lamp. The video does not show any curing, so rely on the instructions of the products you use.
- Plan the layout. Decide where the bow will sit, near the top, and leave room below it for the hearts and the pearls.
- Lay out your tools. Keep the flat brush, the fine brush, the dotting tool and the tweezers within reach.
- Work one nail at a time. Small details are easier when each step is under control.
Step-by-step black bow nails tutorial
The eight steps of this black bow nails tutorial follow the order of the video. Each card shows the frame we used, what happens in it and what to watch for.
Place the first bow on the gradient
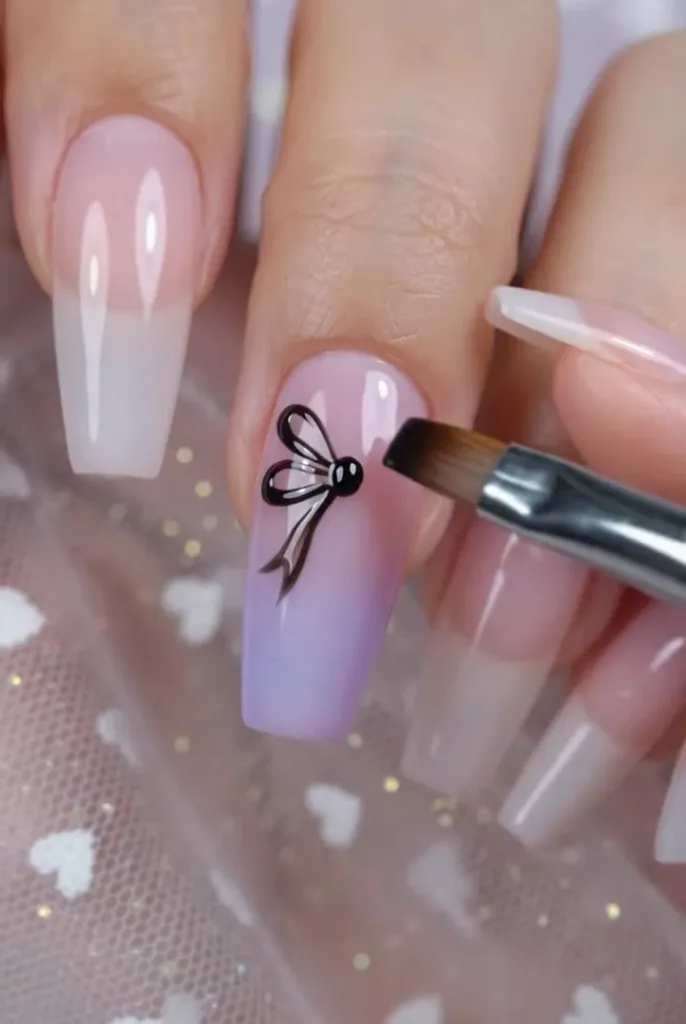
The first frame shows a nail that already has a soft gradient from clear pink at the cuticle to lilac towards the tip. A small black bow has been drawn near the top, with a dark bead at its knot, while a flat brush waits on the right. The video does not show how the gradient is made or what product it is, so follow the instructions of your own system.
Pro tip: place the bow in the upper third of the nail, so there is room for other details below it.
Mistake to avoid: drawing the bow too large. It leaves no space for the hearts and the pearls.
Shape the loops of the bow
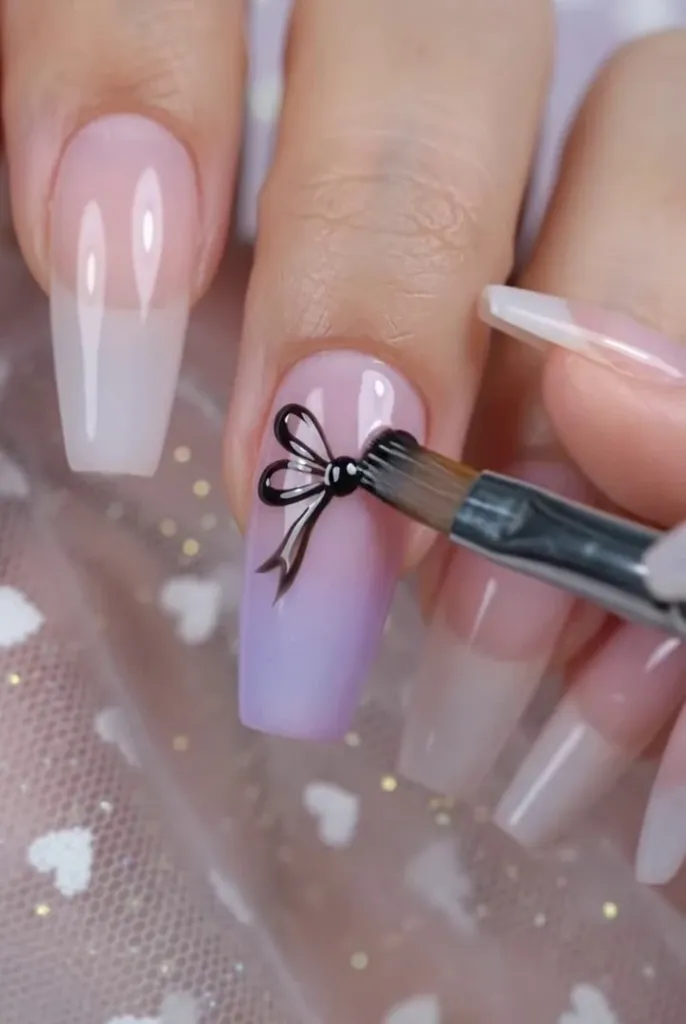
In the second frame the bow is slightly fuller, with two loops and two tails, and the flat brush touches the right side of the nail. The outline is thin and black, and the inside of the ribbon is still the colour of the nail. The video does not say what the brush applies, so we describe only the shape that is visible.
Pro tip: keep the two loops about the same size and let the tails fall at slightly different angles.
Mistake to avoid: making the outline too thick. A thin line keeps the ribbon light.
Add the white highlights with a fine brush
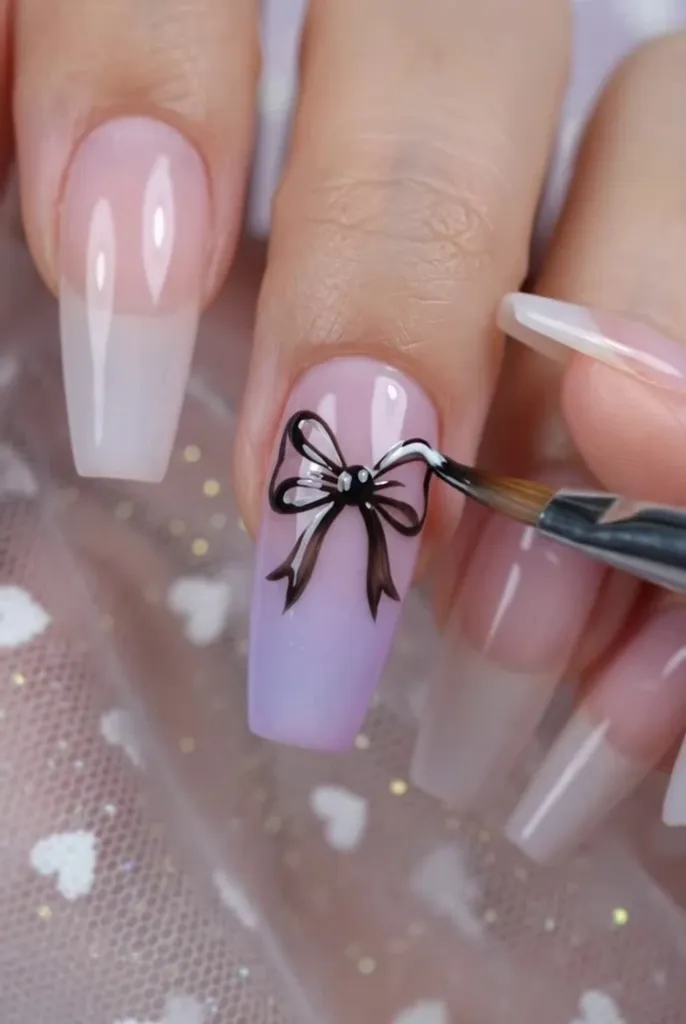
The third frame shows a larger bow whose loops are crossed by thin white lines, while a fine brush works at the right. The white highlights give the ribbon volume and make it look like glossy satin. The tails hang below the knot, and the lilac of the gradient is clearer at the tip of the nail.
Pro tip: draw the highlights with one light stroke in the direction of the loop.
Mistake to avoid: covering the whole loop with white. The black outline should stay dominant.
Add the pink hearts and the first pearl
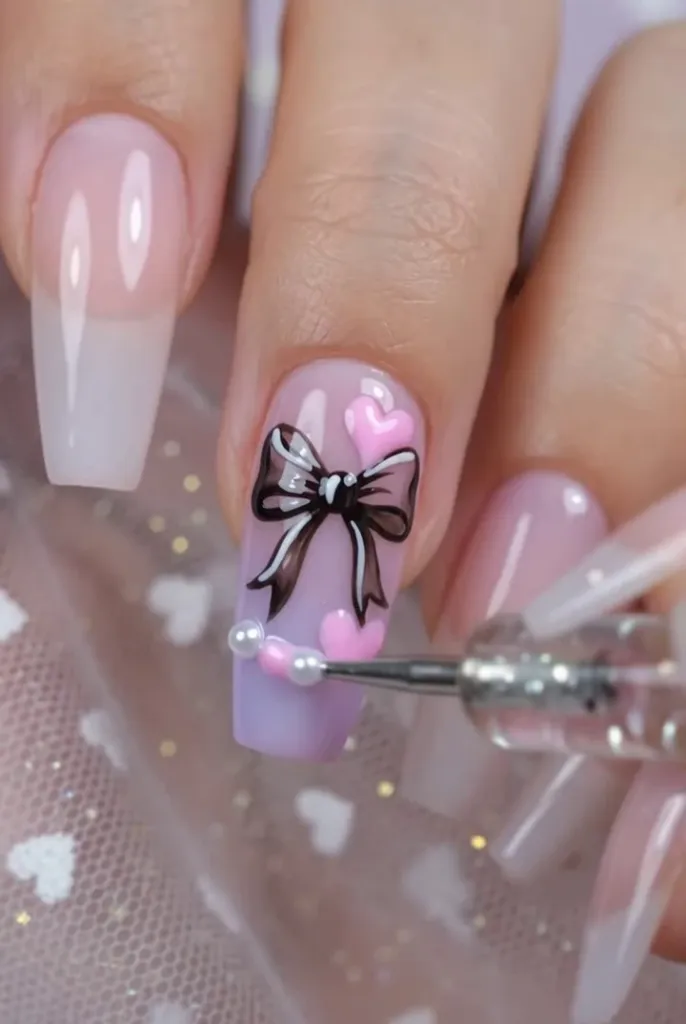
In the fourth frame two pink hearts appear, one at the top right of the bow and one below it, and a dotting tool with a clear handle places a small pearl at the lower left of the nail. The hearts are small, glossy and slightly raised, and the bow now has a dark knot and a grey-white fill. The video does not say how the pearl is fixed, so follow the instructions of your own products.
Pro tip: place the hearts on opposite sides of the bow so the design stays balanced.
Mistake to avoid: making the hearts too big. They should support the bow, not compete with it.
Frame the nail with pearls and sparkle glints
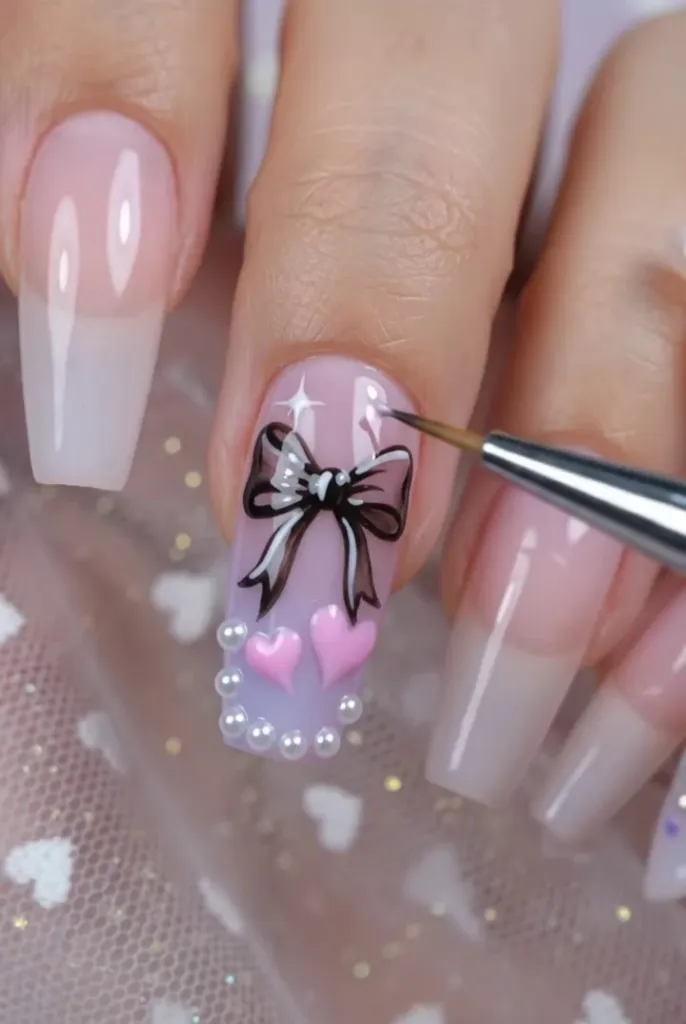
The fifth frame shows a ring of tiny white pearls along the lower edge and the sides of the nail, with two pink hearts above them. A fine brush touches the top, where a small star-shaped sparkle glints next to the bow. Fine silver glitter appears over the lilac.
Pro tip: space the pearls evenly, with a tiny gap between them, so the ring looks neat.
Mistake to avoid: letting the pearls touch each other. They can crowd the edge.
Set a pearl and a crystal with tweezers
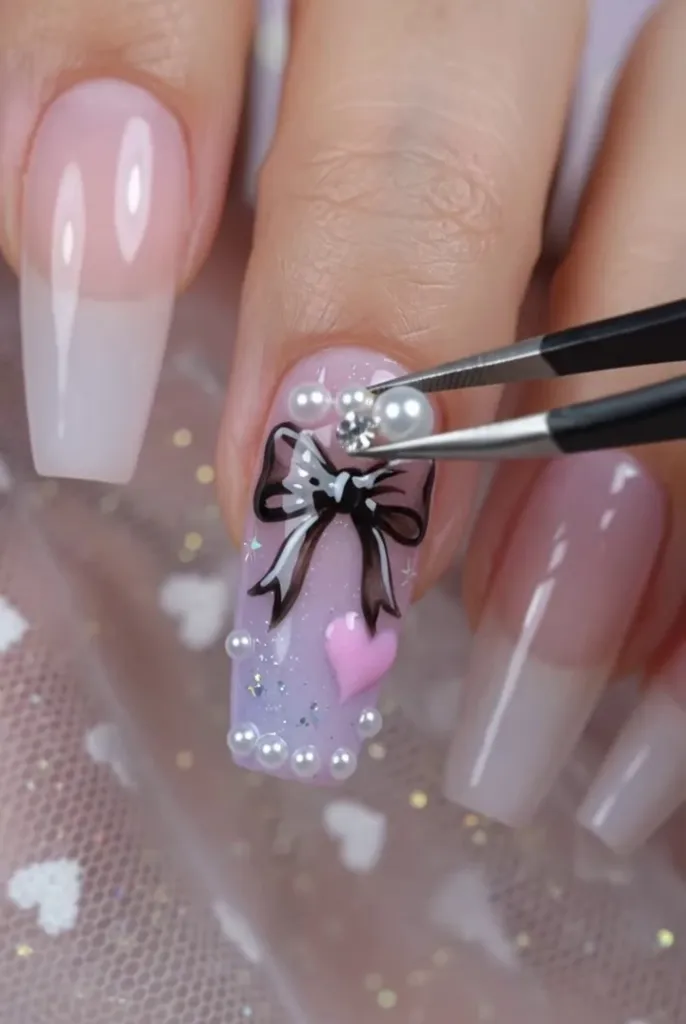
In the sixth frame a pair of pointed tweezers holds a small pearl and a crystal at the top of the bow, where a small cluster is forming. The bow already has a grey-white fill, and the ring of pearls is complete. The video does not say how the stones are fixed, so follow the instructions of your own products for this step.
Pro tip: pick each stone up by its edge and set it straight down, so it sits flat.
Mistake to avoid: placing a stone on the outline. It can hide the black line.
Add more stones around the bow
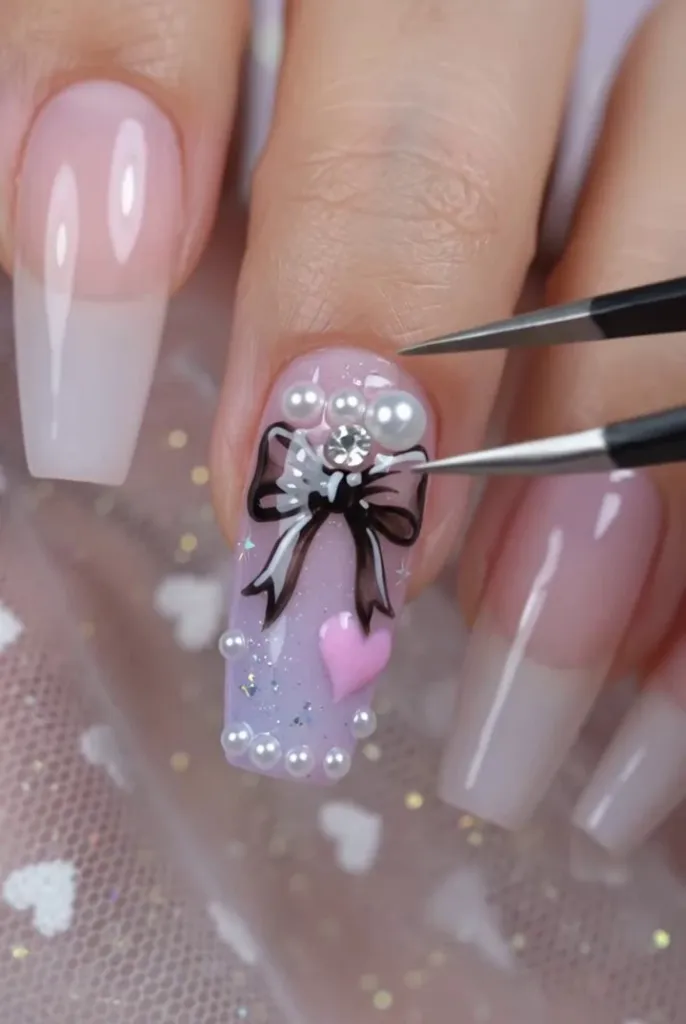
The seventh frame shows the tweezers placing another pearl near the top of the bow, where two stones and a pearl now gather above the knot. The pink heart below the bow shines, and the glitter on the lilac gives the nail a frosted look. The design is almost complete.
Pro tip: vary the size of the stones, with one larger crystal and a few small pearls.
Mistake to avoid: adding too many stones. The bow should still be the main focus.
Reveal the finished black bow nails
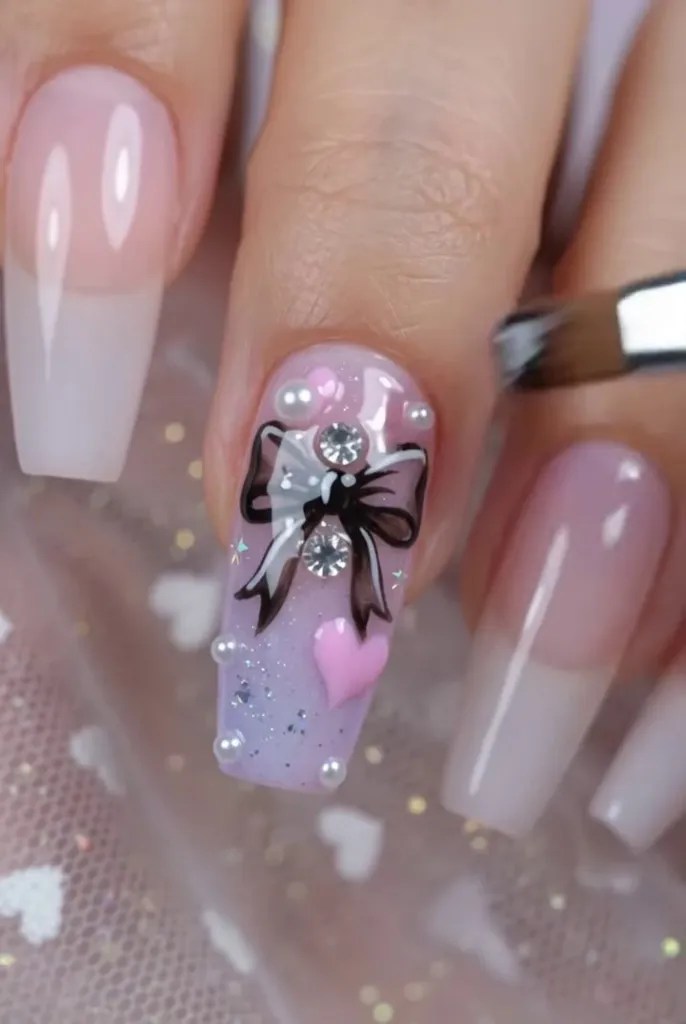
The last frame shows the finished nail: a lilac and pink gradient, a black bow with a grey-white fill and two crystals, a pink heart near the tip, white pearls around the edge and fine glitter, while a flat brush appears at the right edge of the frame. The finish is very glossy, as in a sealed design. The video does not show which product creates this finish, so use the finishing layer that suits your own system and follow its instructions.
Pro tip: tilt the nail in the light, as in the video, to see how the crystals and the pearls catch the light.
Mistake to avoid: using a finishing layer that does not belong to your system. Mixing product families can dull the gradient.
Pro tips for cleaner black bow nails
- Keep the base smooth. A flat surface makes the outline clean.
- Draw the bow first. Everything else is arranged around it.
- Use thin lines. Light outlines look elegant.
- Balance the hearts. Place them on opposite sides.
- Space the pearls. An even ring looks like a frame.
- Place the stones last. They are easy to add and hard to remove.
- Check in daylight. Pastel colours look different under a lamp and in the sun.
Creative variations (our suggestions, not shown in the video)
The video shows one design. The ideas below are suggestions based on the same technique.
- A white bow. Draw the bow in white on a sheer pink base for a bridal look.
- A pink bow. Replace the black with a deep pink for a softer feel.
- Mint ombré. Swap the lilac for a pale mint gradient.
- A matte finish. A soft matte finishing layer gives the bow a velvet look.
- One pearl only. Keep a single pearl at the knot for a minimal version.
- A short-nail version. Draw a small bow and one heart.
When do black bow nails suit you best?
This design suits birthdays, parties, spring and autumn outfits and any day when you want a playful but polished manicure. Because the neighbouring nails stay milky and simple, the bow nail becomes a clear focal point, and the look works with both casual and dressed-up outfits. If you are trying black bow nails for the first time, begin with one nail, compare the result with the frames of the video and then decide whether to repeat the bow on another finger.
Why the order of the steps matters
The order in the video has a clear logic. The gradient comes first because everything else sits on it. The bow follows, because it is the main element and fixes the layout. The highlights are added before the hearts, since they give the bow its volume. The pearls and the sparkle glints come next, and the crystals come last, because they are the highest and most fragile elements, while the finishing pass protects everything before it. This sequence reduces corrections and keeps the black lines clean.
Questions to ask yourself before you start
Ask yourself three simple questions. First, how long and how shaped are my nails? The video shows a long coffin nail, so on shorter nails draw a smaller bow and fewer pearls. Second, how confident am I with fine drawing? Thin outlines need a steady hand and patience, so begin with one nail. Third, which look do I want? For a quiet look, draw the bow and one heart, and for a richer look add the pearls and the crystals. Remember that the video names no products and gives no curing times, so always follow the instructions of your own products and your own lamp.
Care and safety
Nail products can contain ingredients that call for careful use. The U.S. Food and Drug Administration (FDA) reminds consumers to read the labels of nail products and to follow the warnings, and notes that some ingredients can be harmful if swallowed and that some can catch fire near heat. Its page on nail care products is worth reading before you start.
If you do your nails often, the U.S. Occupational Safety and Health Administration (OSHA) describes the chemical exposures that nail technicians face, a useful reminder to work with good ventilation and to follow the safety information of your products. See its overview of health hazards in nail salons.
- Follow your own products and lamp. Curing requirements vary from one product to another, and the video does not state any, so neither do we.
- Keep products away from heat and flames. Close the bottles after use and store them away from heat.
- Stop if your skin reacts. If you notice irritation, remove the product and consult a qualified professional.
- Keep decorations away from children and pets. Pearls and small charms can be a choking hazard.
- Remove the design gently. Use the removal method recommended for your product instead of peeling the artwork.
Black bow nails: frequently asked questions
How do you do black bow nails step by step?
Start from a soft pink-to-lilac gradient, draw a black bow near the top of the nail, add white highlights to give it volume, place two pink hearts beside it, set small pearls along the bottom, add tiny sparkle glints and a few crystals on the bow, and finish with a layer that suits your products.
Which tools does this design need?
The video shows a flat brush with brown bristles, a fine brush with a silver handle, a dotting tool with a clear handle and a pair of pointed tweezers.
How do you draw the bow?
Place it in the upper third of the nail, draw two loops and two tails with a thin black line, and add thin white highlights in the direction of each loop.
How do you place the pearls?
Use a dotting tool, space the pearls evenly along the lower edge and the sides, and fix them in line with the instructions of your own products.
How do you set the crystals?
Pick each crystal up with tweezers by its edge and set it straight down near the knot of the bow, fixing it in line with your product instructions.
Does this design work on short nails?
Yes. The video shows a long coffin nail, but on shorter nails you can draw a smaller bow and one heart.
What colours can replace black and lilac?
As suggestions, try a white bow on a sheer pink base for a bridal look or a pale mint gradient instead of the lilac.
Are nail products and lamps safe to use at home?
Nail products are regulated as cosmetics and should be used as directed. The FDA advises reading labels and following warnings, and notes that some ingredients are harmful if swallowed or can catch fire near heat. Follow the instructions of your products and lamp, keep small decorations away from children and pets, and stop if your skin reacts.
Conclusion: black bow nails, a little ribbon with a lot of charm
Black bow nails look detailed, but the video shows a clear sequence: a pink-to-lilac gradient, a black bow with white highlights, pink hearts, a ring of pearls and a few crystals. Draw the bow first, keep the lines thin and let the pearls frame the nail.
If you enjoy seasonal designs, continue with our Halloween toe nails ideas for ghost and pumpkin pedicure designs, learn how to pick the right outline with the nail shape guide, or explore a darker palette in our dark red toe nails ideas. More nail art guides are published regularly on GetDailyTrend.
Sources, all consulted on 7 November 2026: FDA, Nail Care Products · OSHA, Health Hazards in Nail Salons.