







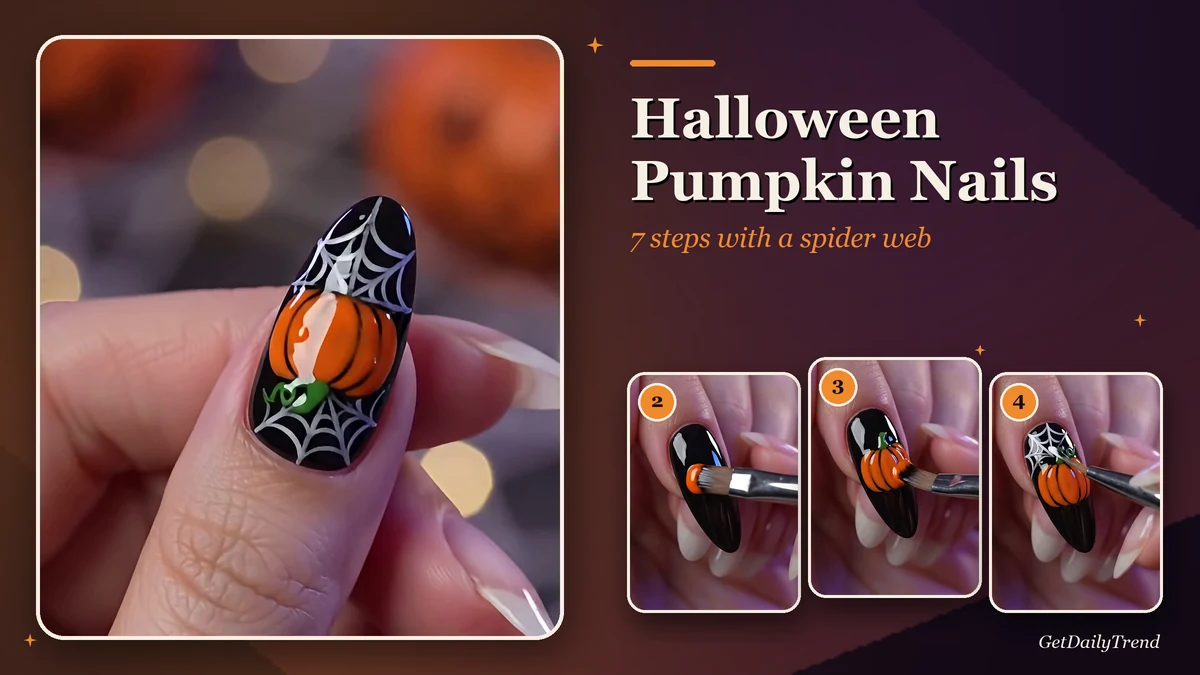
Halloween pumpkin nail art is one of the most recognisable seasonal designs, and this tutorial breaks it down into seven clear stages: a glossy black base, a hand-painted orange pumpkin, a fine white spider web, a tiny black spider and a few finishing details.
Everything below is based on a real step-by-step video of the design being painted on a long almond-shaped nail, so each stage is illustrated with a frame taken from that footage. You will see what the design looks like, which tools are visible, how the layers are built in the right order and which small mistakes spoil the result. Our editorial policy explains how we describe what we can and cannot see.
The video behind this pumpkin nail art tutorial is a short clip with no spoken instructions, so we describe only what is visible on screen: the brush shapes, the colours, the order of the layers and the final look. We do not know the brand of any product, and we do not know whether the paints are gel, polish or acrylic. Where the video is silent, we say so and offer a general suggestion, clearly marked as a suggestion.
Key takeaways
- This Halloween pumpkin nail art is built on one accent nail: glossy black base, orange pumpkin, white spider web, black spider and a few dots of detail.
- Two brush shapes are visible: a small flat brush for the pumpkin and a fine pointed liner for the web, the spider and the details.
- The order matters: pumpkin first, then the web around it, then the spider on top, then the small highlights.
- The video does not show the brand, the paint type or any curing time, so follow the instructions on your own products.
- Treat the spider web and spider as separate steps: thin lines need a steady hand and a nearly dry brush load.
Contents
Quick answer: how do you paint pumpkin nail art on black nails?
Start from a glossy black nail. Paint an orange pumpkin shape with a small flat brush, add darker curved lines for the ribs and a green stem with a curl, draw a white spider web around it with a fine liner brush, add a tiny black spider on top, finish with small white and orange dots and seal the design with a shiny top layer.
What this Halloween pumpkin nail art looks like
The finished nail is a high-contrast design. The background is deep, glossy black, which makes every colour on top of it look brighter. In the centre sits a rounded orange pumpkin with visible vertical ribs, drawn with slightly darker lines so the shape looks three-dimensional. A short green stem and a small curl of vine sit on top. White spider-web lines cover the upper part of the nail and return again below the pumpkin, and a small black spider with thin legs sits on the pumpkin’s right side. Tiny white dots catch the light on the pumpkin and a single orange dot appears near the lower web.
The video also shows the other fingers: long, almond-shaped nails with a pale, natural-looking tip. The pumpkin design is shown on a single accent nail, which is a practical choice: the detailed finger becomes the focus and the others stay simple. That makes the idea easy to repeat at home, because you only have to paint one detailed nail per hand.
Why this pumpkin nail art works
Black and orange is the classic Halloween pairing, and the spider web adds texture without needing more colours. This pumpkin nail art is also forgiving in one way: the web is made of thin lines that do not have to be perfectly symmetrical, because real webs are irregular. It is demanding in another way: the pumpkin needs a clean shape, and the spider needs very fine, controlled strokes.
Materials and tools for pumpkin and spider web nail art
The video shows two brushes clearly. Everything else in the list below is either visible as a colour on the nail or a reasonable addition. We separate the two groups so you know what is actually confirmed by the footage.
Visible in the video
- A small flat synthetic brush with a silver metal ferrule, used to apply and shape the orange pumpkin.
- A fine, pointed liner brush, used for the white web, the black spider and the small details.
- Glossy black colour already covering the nail at the start.
- Orange, green, white and black colour for the pumpkin, the stem and vine, the web, the spider and the dots.
- A shiny finish on the nail at the end.
Suggested additions (not shown in the video)
- A base coat and a cleaned, shaped nail before you start.
- A small palette or a piece of foil to hold tiny amounts of each colour.
- A lint-free wipe and a little cleanser or remover to tidy the edges.
- A top coat suited to the type of product you are using.
- A lamp only if your products require curing. The video does not show one.
Materials checklist
- Small flat brush for the pumpkin
- Fine liner brush for the web, spider and dots
- Glossy black colour for the base
- Orange colour for the pumpkin
- Green colour for the stem and the vine curl
- White colour for the web and the highlights
- Black colour for the spider (the same black as the base)
- Palette or foil for tiny amounts of colour
- Lint-free wipe and cleanser for neat edges
- Top coat that matches your product type
Preparation before you start
Good Halloween pumpkin nail art begins before the first brushstroke. In the video, the black surface is already smooth and mirror-like, and that is what you want to reproduce: a clean, even base that gives the fine lines something stable to sit on.
- Shape and tidy the nail. The design in the video sits on a long almond shape, but the same artwork works on short, square or oval nails if you scale the pumpkin to the available space.
- Let the base be completely finished. Whatever product you use for the black layer, follow its own instructions so it is fully set before you add detail. Painting on a base that is still soft drags the colour and ruins the edges.
- Lay out your colours. Put a small amount of orange, green, white and black on a palette. Small amounts keep the strokes controlled, and you can refresh them whenever they thicken.
- Wipe your brushes. Keep a lint-free wipe close so you can clean the liner between colours and avoid muddy white lines.
- Steady your hand. The video shows the painting hand supported against the other fingers. Resting your wrist or little finger on a table gives the same stability for the thin lines.
Step-by-step Halloween pumpkin nail art tutorial
The seven steps of this pumpkin nail art tutorial follow the order in the video. Each card includes the frame we used, what happens in it and what to watch for.
Start from a glossy black base
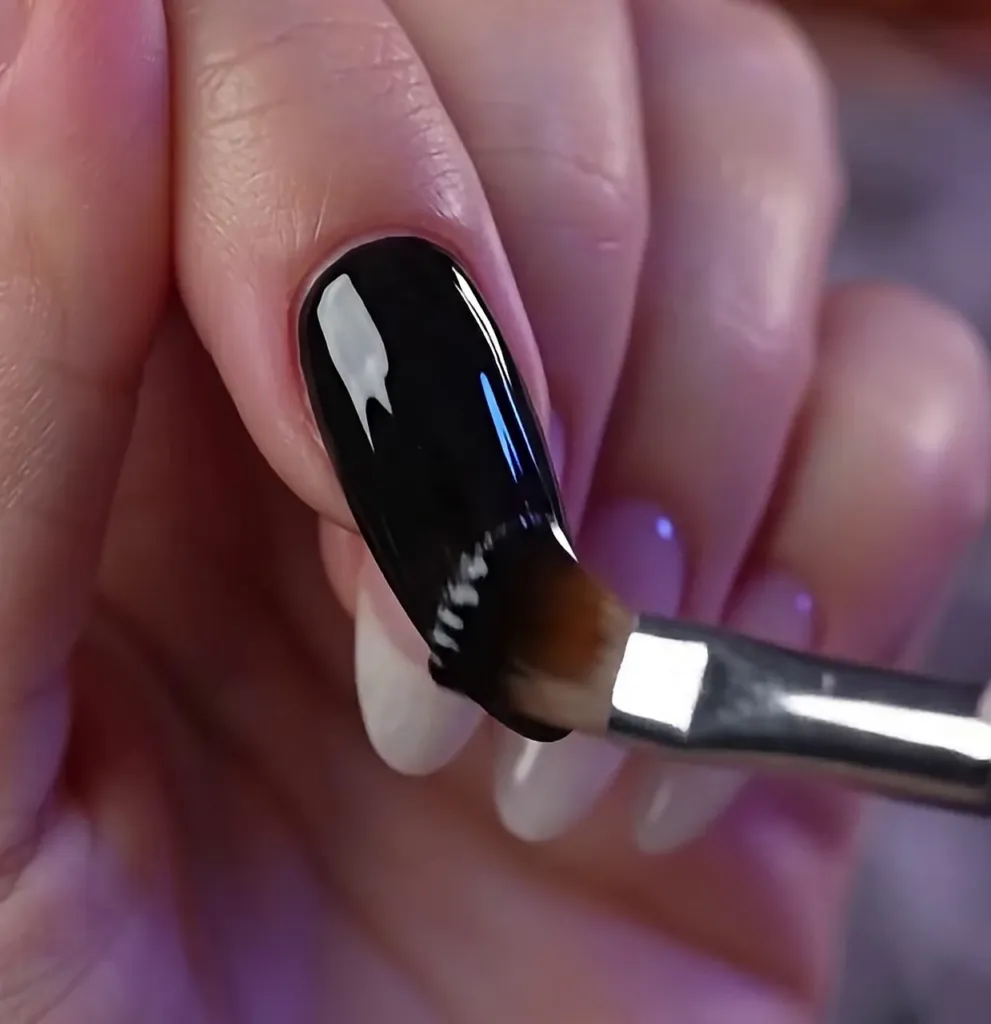
The first frame shows a nail that is already covered with a deep, glossy black layer, while a brush touches the lower part of the nail. No pumpkin and no web exist yet, which tells us the video begins right after the base has been applied. The black layer is the stage on which everything else happens, so it needs to be smooth and fully opaque with no streaks or see-through patches.
Pro tip: check the base in direct light before you continue. Thin patches look grey under bright colours and make the orange look dull.
Mistake to avoid: adding detail too early. A base that is not finished lets the orange and the white blend into the black.
Paint the orange pumpkin shape
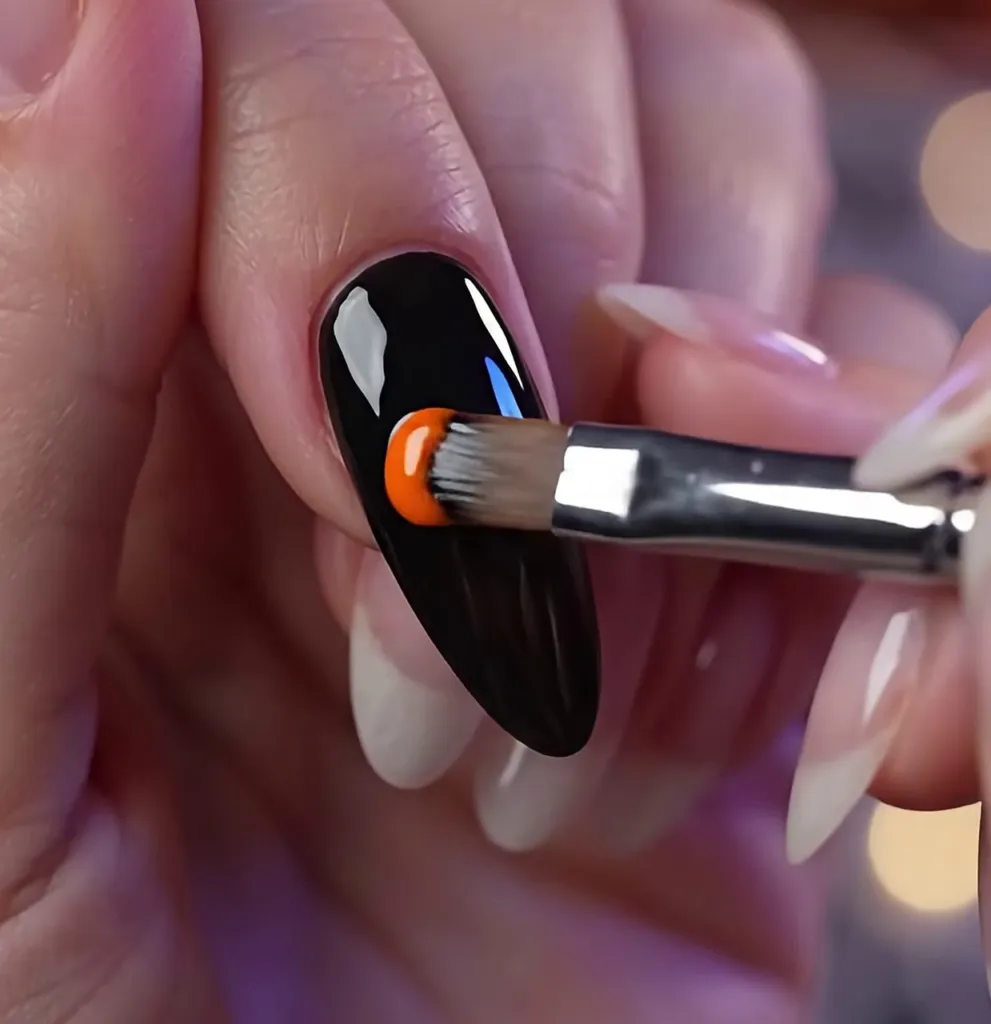
In the second frame an orange shape appears on the black nail, applied with the small flat brush. The shape starts as a compact rounded patch. The brush is held almost flat against the nail so the colour spreads in one smooth stroke instead of being dabbed. Orange on black is naturally bright, so a single confident layer is often enough, and a second thin layer can be added only if the black shows through.
Pro tip: think of the pumpkin as two or three overlapping rounded lobes rather than one circle. That is what gives it the typical pumpkin silhouette in the next step.
Mistake to avoid: loading too much colour on the brush. A heavy bead of orange floods the edges and takes the shape out of control.
Add the ribs, the stem and the vine curl
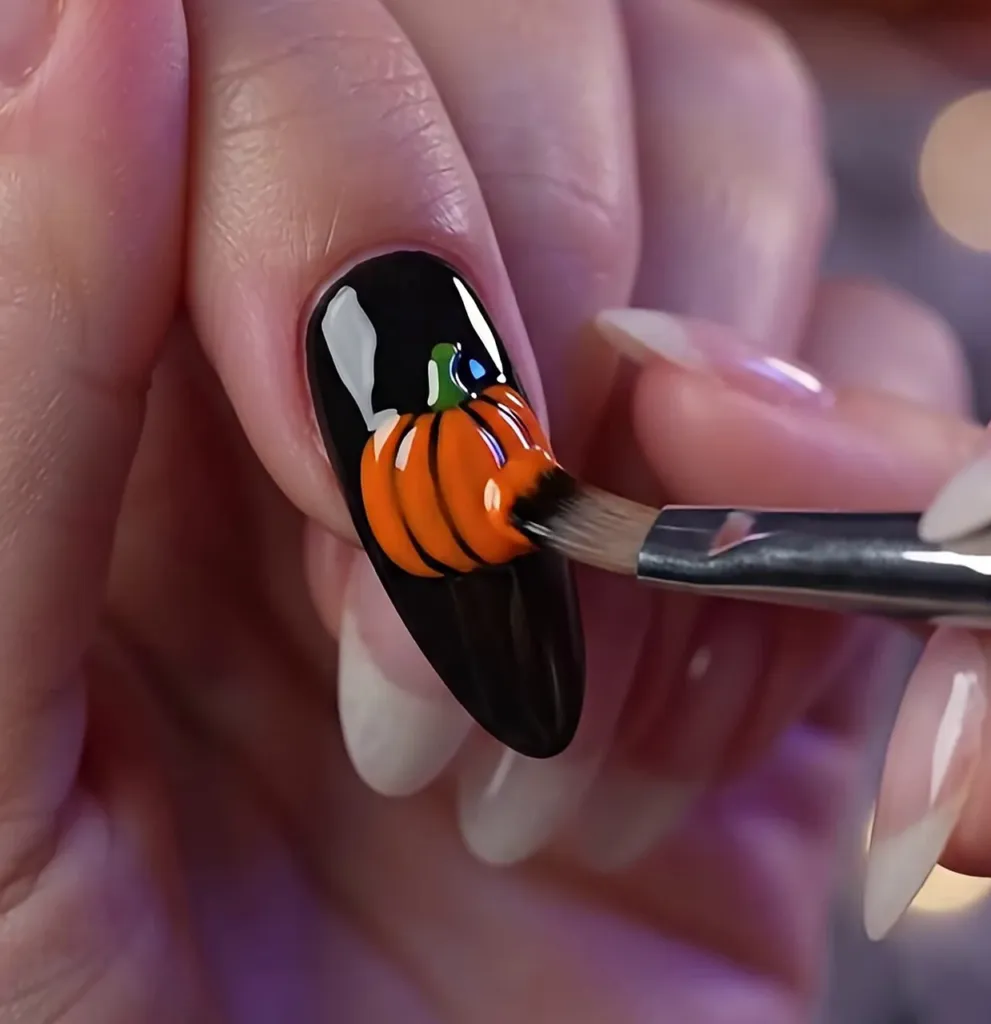
In the third frame the orange patch has become a recognisable pumpkin. Curved vertical lines divide the body into ribs, a short green stem sits on top and a small green curl suggests a vine. The darker curved lines are what make the pumpkin look rounded and three-dimensional, so they should follow the curve of the shape: bending outwards in the middle and coming together at the top and bottom.
Pro tip: paint the ribs with a nearly dry fine brush and one smooth movement per line. Going back over a line makes it thicker than its neighbours.
Mistake to avoid: drawing ribs that are perfectly parallel. Curves that follow the shape look natural; straight lines make the pumpkin look flat.
Draw the white spider web
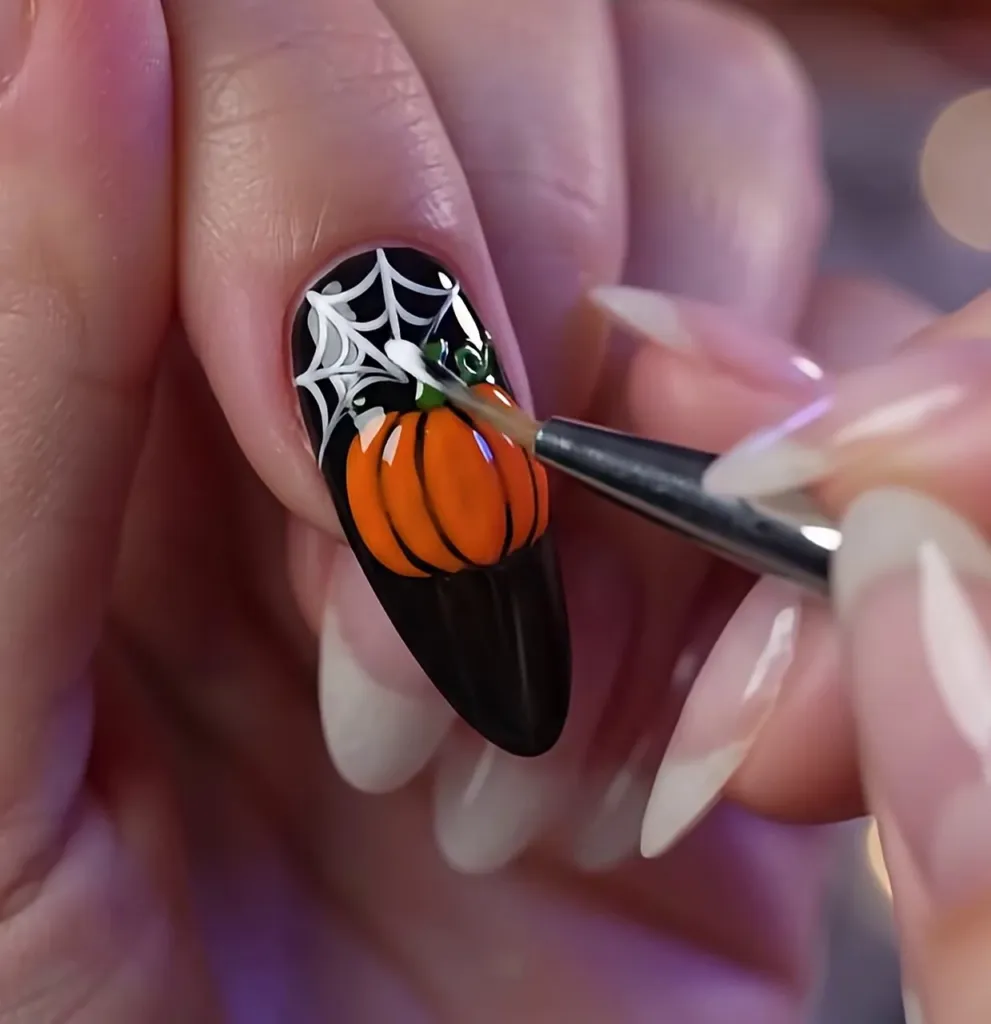
In the fourth frame white lines appear in the upper-left part of the nail and wrap around the top of the pumpkin. A fine pointed brush is used here, and the web follows a simple logic: a few lines radiate from a corner, then curved lines connect them. Because the web sits behind and around the pumpkin, it is drawn after the pumpkin so that the white lines stop at the pumpkin’s outline instead of crossing it.
Pro tip: start with the radiating lines and add the curved connections afterwards. Spacing the first lines unevenly gives a more realistic web than evenly spaced ones.
Mistake to avoid: pressing hard. Pressure widens the line; a light touch with the tip keeps the web delicate.
Extend the web and add the spider
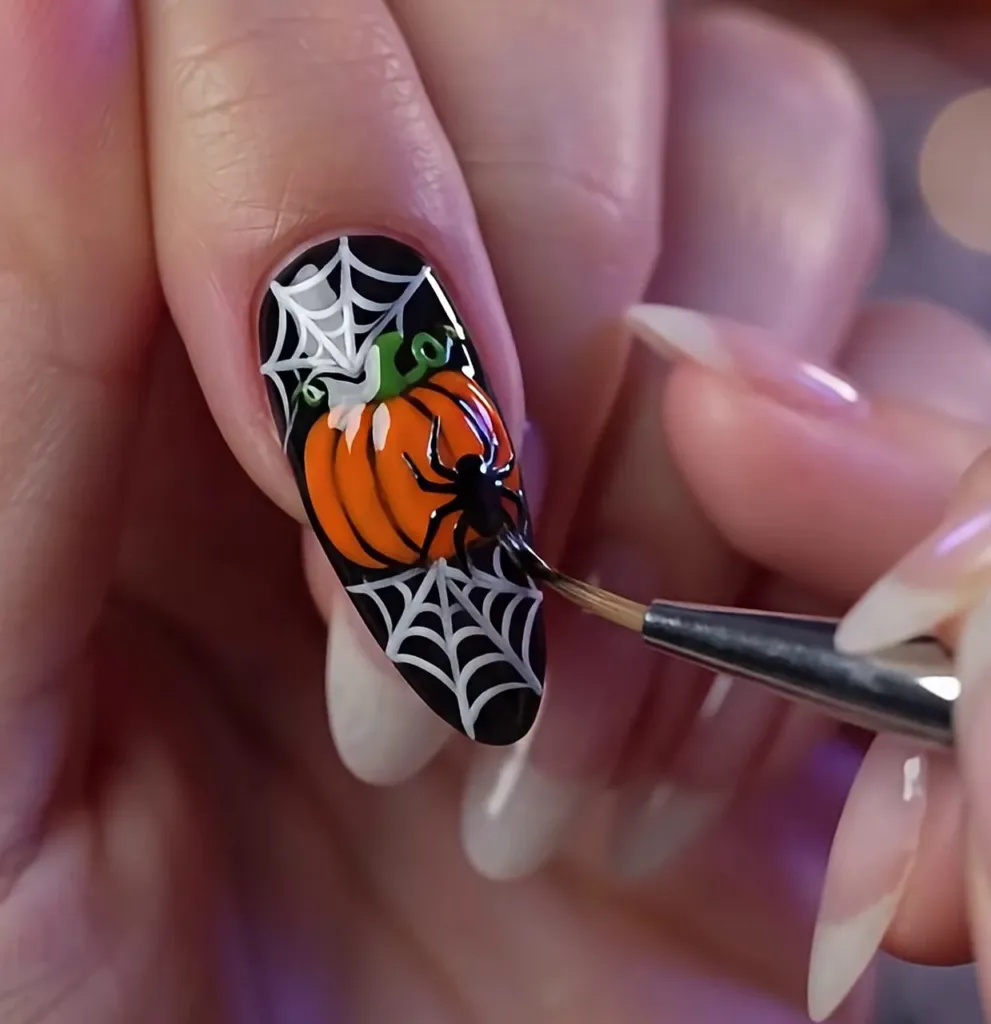
The fifth frame shows a second web at the bottom of the nail and a small black spider with thin legs on the right side of the pumpkin, drawn with the fine pointed brush. The spider is built from a small rounded body and a few fine legs that bend outwards. Black on orange gives high contrast, so even a very small spider reads clearly. Repeating the web at the bottom balances the composition: one web above, one below, and the pumpkin framed between them.
Pro tip: paint the body first, then pull the legs outwards from the body in short strokes. The legs can be slightly uneven, which looks more lifelike.
Mistake to avoid: making the spider too large. It should stay a small accent so that the pumpkin remains the main subject.
Finish with dots, highlights and details
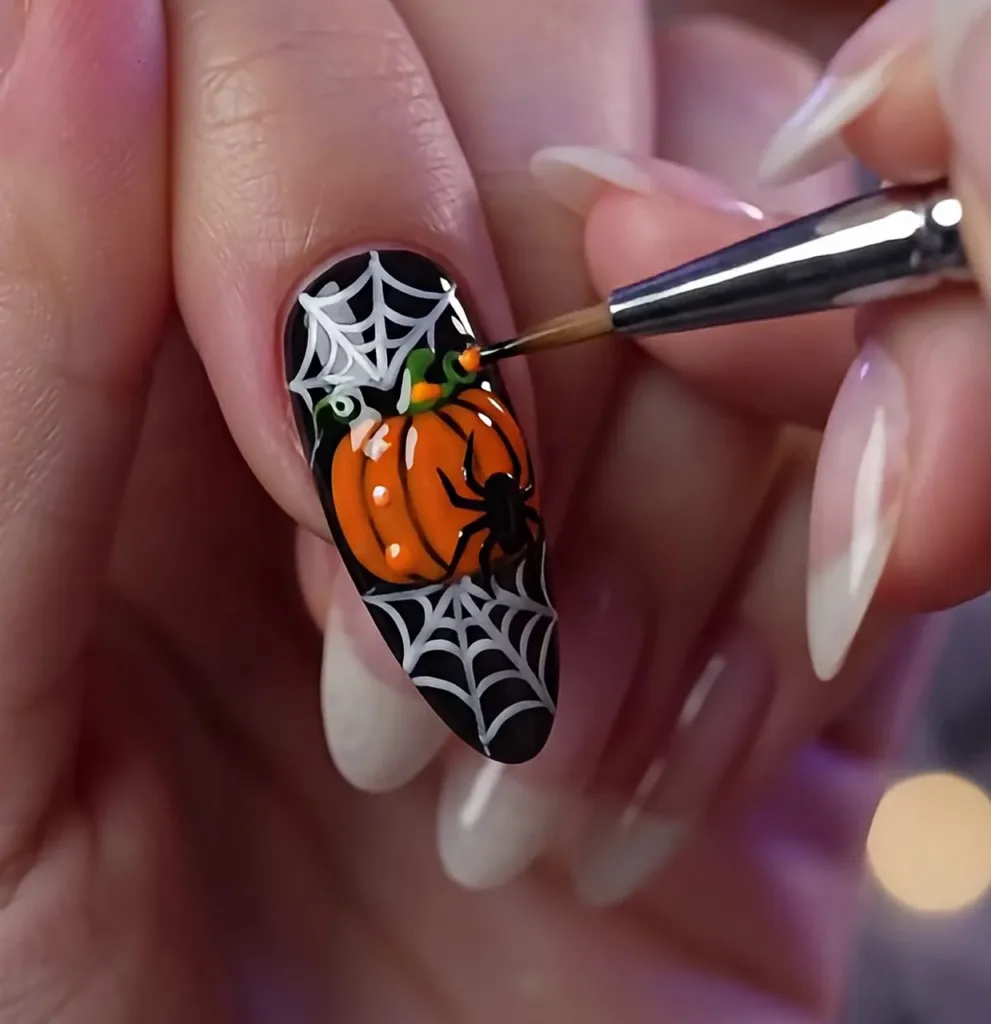
In the sixth frame the pumpkin carries tiny white dots that act as highlights, the green vine has small curls and a small orange dot appears near the lower web. These touches take only seconds but make the design look finished. The fine brush is used again with a very small amount of colour. Placing the white dots on one side of the pumpkin, rather than all around, suggests a light source and adds depth.
Pro tip: touch the nail with the tip of the brush and lift straight up to make a neat dot. Dragging makes a comma instead.
Mistake to avoid: adding too many dots. Three or four well-placed highlights look better than a dozen scattered ones.
Reveal the glossy finish
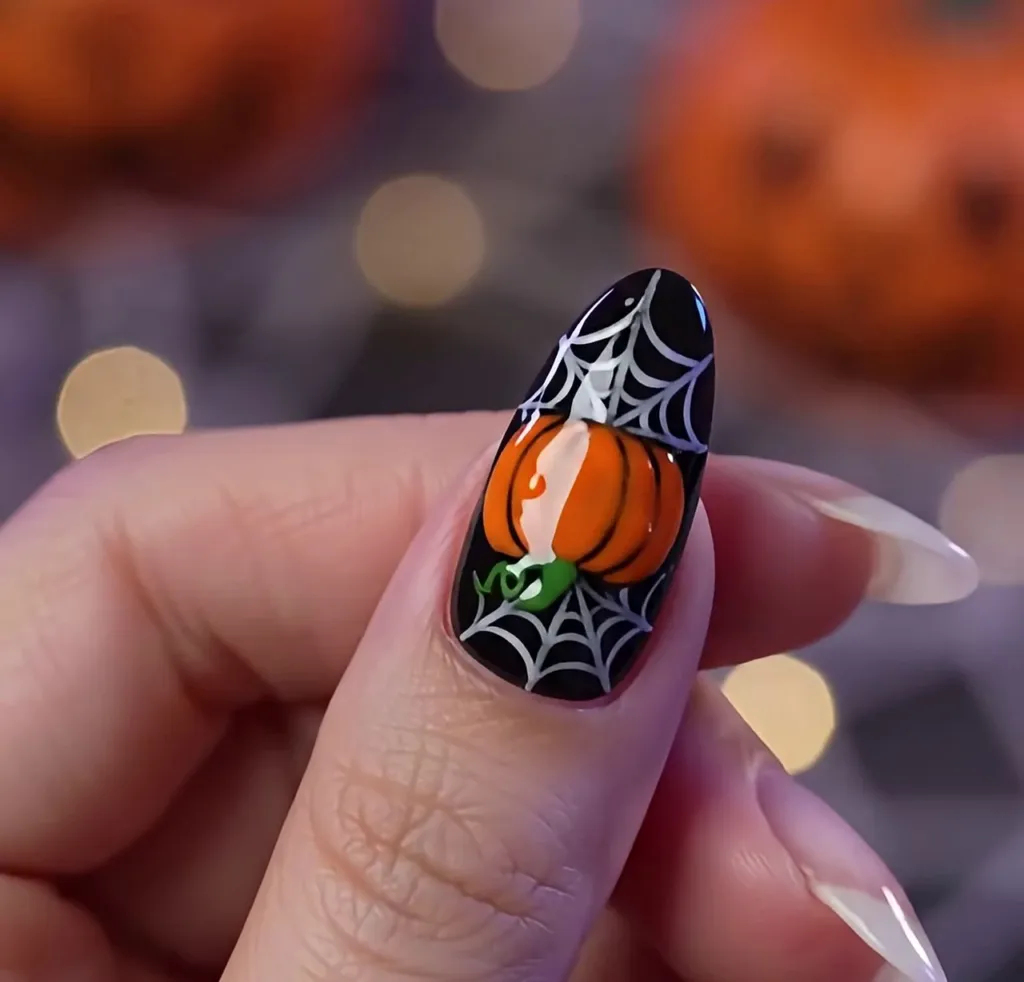
The last frame shows the complete nail from a different angle. The hand turns so the design faces the camera: a glossy black nail, an orange pumpkin with ribs, a green stem and curl, white webs above and below, a small spider and tiny highlights. The surface is shiny, which is typical of a sealed design. The video does not show what product creates the shine, so use the finishing layer that belongs to the system you painted with and follow its instructions.
Pro tip: seal the edge of the nail as well as the surface so the artwork does not lift at the tip.
Mistake to avoid: using a finishing product that does not belong to your system. Mixing product families can cloud the colours or cause the layers to react.
Professional tips for cleaner Halloween pumpkin nail art
- Work in thin layers. Several thin layers of colour are easier to control than one thick one, and they keep the surface flatter.
- Clean the liner often. White and orange mix easily with the black underneath. Wipe the brush between colours.
- Use contrast deliberately. White on black and black on orange are the strongest contrasts in the design. Use them for the elements you want to stand out: the web and the spider.
- Keep the design off the cuticle and the side walls. A small margin around the artwork looks neater and helps it last.
- Take a pause. If your hand starts to shake, rest. Fine lines painted while tired look uneven.
- Check the design in natural light. Under a lamp, a slightly thick line may look fine; in daylight it shows.
Creative variations on Halloween pumpkin nail art (our suggestions, not shown in the video)
The video shows one pumpkin nail art design. The ideas below are suggestions based on the same technique, and each one keeps the spider web nail art idea of fine white lines on a dark base.
- A blood-red web. Replace the white web with a deep red one for a darker, more dramatic look.
- A ghost instead of a pumpkin. Use the same flat-brush technique with white on black, then add two black dots for the eyes.
- A purple or teal pumpkin. Change the orange to a less traditional colour for a modern take on the theme.
- A bat silhouette. Paint a small black bat on a coloured background with the fine liner.
- A matte finish. If you prefer a velvet look, choose a matte finishing layer instead of a glossy one.
- Full set, one accent. Keep the other nails plain black, nude or French-style and use the pumpkin only as the accent nail.
Care and precautions for spider web nail art and other designs
Nail products can contain ingredients that need careful use. The U.S. Food and Drug Administration reminds consumers to read the labels of nail products and to follow any warnings, and notes that some ingredients can be harmful if swallowed and some can catch fire near heat sources, so its guidance on nail care products is worth reading before you start.
If you paint nails often, the U.S. Occupational Safety and Health Administration describes the chemical exposures nail technicians face, which is a useful reminder to work with good air circulation and to follow the safety information of your products: see OSHA’s overview of health hazards in nail salons.
- Follow your products’ instructions. Drying or curing requirements differ from one product to another, and the video does not specify any, so we do not either.
- Keep products away from heat and flame. Close bottles after use and store them away from heat.
- Stop if your skin reacts. If you notice irritation, remove the product and seek advice from a qualified professional.
- Keep your tools clean. Wipe brushes after use and keep them dry so the bristles keep their shape.
- Remove designs gently. Use the removal method recommended for your product instead of picking the artwork off, which can damage the nail surface.
Halloween pumpkin nail art: frequently asked questions
How do you paint a pumpkin on a nail?
Start with a glossy black nail and paint an orange rounded shape with a small flat brush, thinking of it as two or three overlapping lobes. Then add darker curved lines for the ribs, a short green stem and a small curl. Use thin layers so the edges stay controlled, and clean the brush before moving to the next colour.
Which brushes do you need for Halloween nail art?
The video shows two: a small flat synthetic brush for the pumpkin and a fine pointed liner for the web, the spider and the dots. A fine liner is the most useful tool for thin lines, and keeping it clean between colours prevents muddy white lines on black.
How do you draw a spider web on nails?
Start with a few lines radiating from a corner, spacing them unevenly, then connect them with gently curved lines. Use only the tip of a fine brush with a light touch so the lines stay thin. In the video the web is painted after the pumpkin and stops at its outline.
How do you make a tiny spider on a nail?
Paint a small rounded body with the fine liner, then pull a few short, thin legs outwards from it. Black on orange gives strong contrast, so the spider can be very small. Keep it as an accent so the pumpkin stays the main subject.
Does this design work on short nails?
Yes. The video shows a long almond shape, but the same stages work on short, square or oval nails if you scale the pumpkin and the web to the space available. A smaller pumpkin and a simpler web keep the details readable.
What colours go well with a black and orange Halloween design?
White is already used for the web and the highlights, and green for the stem and the vine. As suggestions, you can try a deep red web, a purple or teal pumpkin, or leave the other nails plain black, nude or French-style so the accent nail stands out.
How do you avoid thick, uneven lines?
Use a very small amount of colour on the brush, touch lightly with the tip and draw each line in one smooth movement. Rest your hand against the other fingers or a table for stability, and wipe the brush between colours. Going back over a line usually makes it thicker.
Are nail products safe to use at home?
Nail products are regulated as cosmetics and should be used as directed. The FDA advises reading labels and following warnings, and notes that some ingredients are harmful if swallowed or can catch fire near heat. Work in a ventilated space and follow the instructions of your products. If your skin reacts, stop and ask a qualified professional.
Conclusion: Halloween pumpkin nail art, a small canvas with a big seasonal statement
Halloween pumpkin nail art looks complicated, but the video shows it is a sequence of simple stages: a glossy black base, a rounded orange pumpkin with ribs, a green stem and curl, a fine white web, a tiny spider and a few highlights. Work in thin layers, keep the fine brush clean and let the contrast of black, orange and white do the work. Start with one accent nail, enjoy the spider web nail art details and build from there.
If you enjoy seasonal designs, continue with our Halloween toe nails ideas for ghost and pumpkin pedicure designs, learn how to pick the right outline with the nail shape guide, or explore a darker palette in our dark red toe nails ideas. More tutorials are published regularly on GetDailyTrend.
Sources, all consulted on 7 November 2026: FDA, Nail Care Products · OSHA, Health Hazards in Nail Salons.